Every meal starts on a cutting board. It’s the first surface your food touches, the place where raw vegetables get sliced, herbs get minced, and proteins get prepped. Yet most American kitchens are equipped with cutting boards that have a serious problem, and most people have no idea.
Walk into any grocery store or big-box retailer and you’ll find two options dominating the shelves: plastic boards in every color of the rainbow, and polished wooden boards that look gorgeous but hide some uncomfortable truths. Neither is as safe as it appears. And one of them, the plastic cutting board, may be quietly contaminating every single meal you prepare.
Here’s what the science says and what you can do about it.
The Plastic Cutting Board Problem: Microplastics in Every Meal
What the Research Found
For years, plastic cutting boards were considered the gold standard of food safety. They’re easy to sanitize, dishwasher-safe, and non-porous, or so everyone thought. But a growing body of peer-reviewed research has completely upended that assumption.
A landmark 2023 study published in Environmental Science & Technology found that using a plastic cutting board can generate between 1,536 and 7,680 tiny plastic fragments per use. Fragments that end up mixed directly into your food. Researchers at North Dakota State University found that cutting carrots on a plastic board could produce as many as 15 microplastic particles per knife stroke, adding up to roughly 50 grams of microplastics per person per year. That’s roughly equivalent to the weight of ten plastic credit cards. And that’s just from your cutting board.
The study compared two of the most common cutting board plastics: polypropylene (PP) and polyethylene (PE). Polypropylene boards shed 5 to 60 percent more mass and 14 to 71 percent more particle count than polyethylene. Both are alarming. Estimates suggest that annual exposure from a PP board alone could reach 49.5 grams of microplastics, and up to 79.4 million individual particles for polyethylene boards.
A 2025 study published in Environmental Health Perspectives took this further by feeding mice food that had been prepared on plastic cutting boards for 4 and 12 weeks. The results raised serious concerns. Microplastic exposure from cutting boards was associated with measurable intestinal inflammation, disruption of gut microbiota, and altered liver metabolism.
What Makes Plastic Cutting Boards So Bad
The core problem is structural. Every time a knife scores the surface of a plastic board, it shears off microscopic fragments of polymer. The harder you cut, the more you release. Vegetables are particularly effective at picking up these fragments. Carrots, for instance, were found to embed microplastics directly into their cut surfaces in lab conditions.
Critically, a 2023 study found that about 50 percent of the released microplastics end up in the food you’re preparing. The other 50 percent remain on the board or wash down the drain, but they still contribute to environmental pollution.
What Microplastics Actually Do to Your Body
While researchers are still learning the full picture, the emerging evidence is concerning. Animal studies have linked microplastic exposure to oxidative stress at the cellular level, reproductive harm, and endocrine disruption, which means interference with the body’s hormonal signaling. Some microplastics are small enough to be absorbed into tissues, where they may trigger chronic inflammation.
Scientists at the Environmental Working Group have noted that exposure to plastics, often at surprisingly low thresholds, is linked to greater risk of adverse health outcomes like stroke and heart attack. The plastic particles themselves can also act as chemical carriers, absorbing and concentrating other pollutants and delivering them directly into your digestive system.
To be clear, the full clinical picture in humans is still being studied. But the trend in the research is clear. Plastic cutting boards are a meaningful and underappreciated source of daily microplastic ingestion, and the cumulative effects over years of use are not well understood.
The “BPA-Free” Label Doesn’t Help
Many plastic cutting boards are marketed as BPA-free. This is largely irrelevant. BPA is a specific chemical used in some plastics, but the problem with microplastics from cutting boards is the physical fragmentation of the polymer itself, whether that polymer is polypropylene, polyethylene, or anything else. “BPA-free” plastic still sheds microplastic particles in exactly the same way.
The Dishwasher Makes It Worse
High heat and harsh dishwasher detergents accelerate the degradation of plastic cutting boards. Repeated dishwasher cycles cause the surface to break down faster, increasing the rate at which microplastics are shed during subsequent use. A worn or scratched plastic board is exponentially worse than a new one, and most households run their boards to the ground before replacing them.
The Problem with Store-Bought Polished Wooden Boards
Walk past the plastic section and you’ll find wooden cutting boards, often beautifully finished, smooth to the touch, and almost irresistibly rustic-looking. But the very thing that makes most commercial wooden cutting boards look appealing is precisely what makes them potentially hazardous.
What Those Finishes Actually Are
Most wooden cutting boards sold in retail stores, including so-called “premium” brands, are treated with one or more of the following:
Polyurethane or lacquer varnish. These film-forming finishes create a hard, glossy surface. They look stunning. The problem is that knives cut through them. Once the finish is compromised, you’re slicing into a cocktail of cured resins and solvent residues every time you prep food. While cured polyurethane is generally considered non-toxic in large quantities, the fragments that end up in your food from a scratched, cut-up board are a different story. As one analysis noted, chopping and slicing will compromise the finished layer, which, like plastic, will end up in your food.
Formaldehyde-based adhesives. Most wooden cutting boards sold in stores are not made from a single solid piece of wood. They are constructed by gluing together multiple strips or pieces of wood. Many of these adhesives are formaldehyde-based. Formaldehyde is a known carcinogen. Even boards labeled with “food-safe glue” may not be truly formaldehyde-free, a term that requires explicit disclosure, which many manufacturers do not provide.
Mineral oil and “special resin” coatings. Some boards disclose a “special resin lacquer” treatment without specifying what’s in it. Even conventional mineral oil, while generally regarded as food-safe, is a petroleum derivative. Many consumer advocates recommend petroleum-free alternatives for food contact surfaces.
The Antibacterial Paradox
Here’s something counterintuitive. The polished finish that makes commercial wooden boards look clean may actually undermine the wood’s natural antibacterial properties. Research by Seri Robinson, a professor of wood anatomy, found that unfinished raw wood, when rinsed and dried properly, pulls bacteria deep into its fiber structure where the microbes become trapped and die. A film finish keeps bacteria near the surface, where it can multiply. The finish that promises cleanliness may, in fact, be working against you.
Additionally, laminated boards, which are boards assembled from glued pieces, should generally never go in the dishwasher. Heat and water pressure can cause them to split, crack, and potentially release the adhesive materials they were assembled with.
The Stainless Steel Option: What You Need to Know
Given the problems with both plastic and polished wood, stainless steel cutting boards have been gaining attention as a third option. Let’s look at them honestly, pros and cons included.
Why Stainless Steel Has Real Advantages
Completely non-porous. Unlike wood or plastic, stainless steel has no pores, micro-grooves, or surface texture where bacteria, food juices, or pathogens can hide. Every wash with hot soapy water actually cleans the entire surface, something that can’t be said for a scratched plastic board or a wood board with deep knife grooves.
Zero microplastics. A stainless steel cutting board will never shed microplastics. The material is stable and does not fragment under normal kitchen use.
No chemical coatings. Food-grade stainless steel, typically 304-grade, the same used in restaurant kitchens and hospital equipment, contains no toxic coatings, lacquers, or adhesives. It is chemically inert with respect to food. It won’t react with acidic foods like tomatoes or lemon juice, and it won’t absorb or transfer odors.
Lasts essentially forever. A quality stainless steel cutting board won’t warp, crack, swell, or degrade. It’s a one-time purchase with no replacement cycle.
Easy to fully sanitize. You can sanitize a stainless steel board with boiling water, mild bleach solution, or high-temperature dishwasher cycles without damaging the material.
No maintenance. Unlike wood, which requires periodic oiling and careful drying, stainless steel needs only routine washing.
The Real Downsides of Stainless Steel
It is hard on knives. This is the most significant practical concern. Stainless steel is harder than the edge of most kitchen knives. Cutting on steel accelerates blade dulling, particularly with aggressive chopping motions. Professional chefs who use stainless steel surfaces in commercial kitchens compensate with very frequent honing and sharpening. If you switch to a stainless steel board, budget for a good honing steel and expect to sharpen your knives more often.
It can be slippery. A smooth steel surface provides less grip than wood, both for the board itself on the countertop and for food during cutting. You can mitigate this by placing a damp towel underneath the board and by choosing a board with a textured or brushed finish surface.
Louder. The acoustic experience of chopping on metal is noticeably different from wood. This is subjective, but worth knowing.
Cost. A quality stainless steel board costs more upfront than a plastic board, though the lifetime cost is much lower since it never needs replacing.
What Grade to Look For
If you go the stainless steel route, look for 304-grade or 316L-grade food-safe stainless steel. 316L includes molybdenum, which provides higher resistance to corrosion from acidic foods like citrus, tomatoes, and vinegar. A note for those with nickel or chromium sensitivities: stainless steel contains both metals, and trace amounts may be released over time. This is generally not an issue for the general population, but worth knowing if you have metal allergies.
DIY Wooden Cutting Board: The Safest, Most Knife-Friendly Option
For those willing to invest a weekend and some basic tools, building your own wooden cutting board from scratch is arguably the healthiest, most sustainable, and most knife-friendly cutting board solution available. Here’s everything you need to know.
Choosing the Right Wood: Food Safety Starts Here
Not all wood is food-safe. The key principle is this: stick to hardwoods that produce edible fruits, nuts, or sap. These woods are generally recognized as food-safe because their natural compounds are not toxic when consumed in trace amounts.
The best choices:
- Hard Maple. The industry standard. Extremely dense, with a closed grain structure that resists bacterial penetration. Rated 1,450 lbf on the Janka hardness scale. Gentle on knives. Food-safe, with no toxic compounds.
- Black Walnut. Slightly softer than maple at 1,010 lbf Janka, with a rich, dark color that hides stains well. Dense, closed grain. Food-safe.
- Cherry. Beautiful warm color, 950 lbf Janka rating, closed grain. Excellent choice for everyday boards.
- Beech. Similar to hard maple in density and grain structure. Very food-safe, slightly more affordable.
Woods to avoid for a DIY cutting board:
- Pine, cedar, fir. Too soft. Knives create deep grooves quickly, harboring bacteria. Cedar also has natural compounds that can affect food flavor.
- Oak and ash. While hard, these have open grain structures, meaning pores you can see with the naked eye. The open grain absorbs moisture and bacteria deeply.
- Exotic or “purple” woods like Purpleheart, Padauk, and others. These often contain natural compounds, resins, or oils that can be mildly toxic when ingested, even in trace amounts. Avoid all exotic woods unless you have specific documentation confirming food safety.
- Teak. While technically food-safe, teak has a high silica content that significantly dulls knife blades. It’s also sourced partly from regions with deforestation concerns.
- Reclaimed or pallet wood. Never use these. Pallet wood may have been treated with methyl bromide fumigants, pesticides, or have come into contact with industrial chemicals.
The single most important criterion is tight, closed grain, meaning pores invisible to the naked eye. This is what keeps bacteria, moisture, and food particles from penetrating the surface.
Choosing Your Board Design
Face grain (simplest). The flat face of the plank is the cutting surface. Easiest to make, requires minimal tools. Good for occasional use.
Edge grain. Planks are glued together on their edges, creating a surface made of narrow strips viewed from the side. More stable, more durable, the standard for most handmade cutting boards.
End grain (most durable). The cut ends of the wood are the surface. This is the traditional “butcher block” pattern. End grain is self-healing. Knife cuts open the wood fibers rather than scoring across them, and the fibers close back up. Also the most complex to build.
For a first DIY board, edge grain is the recommended starting point.
What You’ll Need (Tools)
- Table saw or circular saw for ripping boards to width
- Miter saw for cutting to length
- Pipe clamps or bar clamps, at least 4
- Orbital sander or sanding block
- Sandpaper: 80-grit, 120-grit, 220-grit
For a single-slab face grain board, which is the simplest option, you only need a saw to cut to size and sandpaper. No glue required.
Step-by-Step: Building a Chemical-Free DIY Cutting Board
Step 1: Select Your Lumber
Purchase a slab of hard maple, walnut, or cherry from a lumber yard, not a home improvement store, which often sells kiln-dried construction-grade lumber unsuitable for cutting boards. Look for lumber that is flat, free of cracks, and has consistent grain throughout. For an edge-grain board approximately 12 by 18 inches by 1.5 inches thick, you’ll need roughly 6 board-feet of hardwood.
Step 2: Mill and Prepare the Strips
Rip your wood into strips of equal width, typically 1.5 to 2 inches wide, using a table saw. The goal is to have multiple strips with clean, flat faces that will glue together tightly. Run each strip through the saw twice: once to create one clean edge, then flip and rip to final width. All faces that will be glued must be perfectly flat.
After ripping, do a dry fit by laying all the strips side by side without glue to confirm they lie flat and the joints are tight.
Step 3: Glue Up the Board
Important note on glue. If you choose to glue strips together, edge-grain or end-grain boards require this, use Titebond III Ultimate Wood Glue. This is a waterproof, water-based, formaldehyde-free adhesive that is FDA-recognized as safe for food contact surfaces. Do not use epoxy, super glue, construction adhesive, or any spray adhesive.
Apply a generous, even coat of glue to the face of each strip. Lay them out on pipe clamps, alternating the grain direction slightly from strip to strip to prevent warping. Tighten the clamps evenly, applying enough pressure to squeeze out a thin bead of glue along each joint. Wipe up excess glue with a damp cloth while still wet.
Allow to dry for a full 24 hours before removing clamps.
For a single-slab face grain board, the simplest and entirely glue-free option, skip this step entirely.
Step 4: Flatten and Sand
Once the glue is dry, scrape off any hardened glue beads with a chisel. Then begin sanding:
- Start with 80-grit sandpaper to flatten any variation between strips
- Progress to 120-grit to smooth the surface
- Finish with 220-grit for a smooth, clean surface
Sand both faces and all four edges. Round the edges and corners slightly to eliminate sharp corners. Do not sand beyond 220-grit for a cutting board. Very high polishing, 400-grit and above, can slow the wood’s natural absorption of moisture and reduce its self-cleaning ability.
After the final sand. Wet the entire board with a damp cloth, let it dry completely, then sand lightly again with 220-grit to knock down any grain raised by the water. This prevents the board from feeling rough after its first wash.
Step 5: Finish with Food-Safe Oils or Wax, No Chemicals
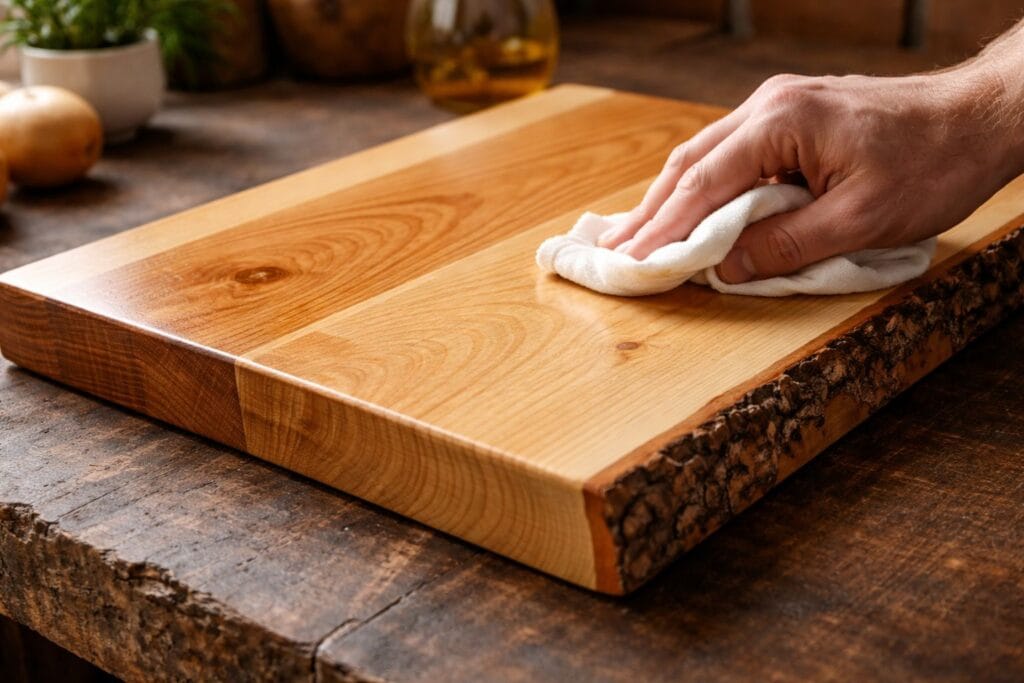
This is where most commercial boards go wrong. Do not use polyurethane, lacquer, varnish, or any film-forming finish. These coatings will be cut through by your knives and end up in your food.
Instead, choose one of the following completely natural, food-safe options:
Option A: Fractionated Coconut Oil or Food-Grade Mineral Oil (simplest).
Apply a generous coat with a clean cloth, allow it to soak in for 20 to 30 minutes, then wipe off excess. Repeat for 2 to 3 coats. This penetrates the wood without forming a surface film.
Option B: Beeswax and Oil Blend (best protection).
Melt pure food-grade beeswax and mix it approximately 50/50 with fractionated coconut oil or food-grade mineral oil in a small saucepan over low heat. While still warm, apply a heavy coat to the board. Allow to sit for 2 hours, then buff with a soft cloth. This creates a slightly water-repellent surface while remaining completely food-safe.
Option C: Leave It Unfinished (the science-backed choice).
This is counterintuitive, but research by wood anatomy professor Seri Robinson at Oregon State University suggests that unfinished hardwood may actually be the safest cutting board surface. When rinsed and allowed to dry completely on all sides, raw hardwood pulls bacteria and contaminants deep into its fiber structure through capillary action, where they become trapped and die. A finish, even a benign one, disrupts this natural process. If you choose to leave the board unfinished, simply wash it with hot soapy water, rinse, and stand it on its edge to dry on all sides.
Avoid:
- Any oil labeled “for decorative use only”
- Vegetable oils, olive oil, or cooking oils not specifically fractionated. These can turn rancid inside the wood.
- Walnut oil if anyone in your household has nut allergies
- Tung oil, which can cause allergic reactions in some people
- Any product not explicitly labeled food-safe
Step 6: Ongoing Care
- Wash by hand with hot soapy water after each use. Do not soak and do not put in the dishwasher. Prolonged moisture causes warping and cracking.
- Dry standing on edge so air circulates on all sides.
- Re-oil when the wood looks dry or dull, approximately every few weeks for new boards, less frequently as the wood becomes fully seasoned.
- Deep clean periodically by rubbing the surface with coarse salt and a halved lemon, then rinsing. The acid neutralizes odors and provides mild antibacterial action without harsh chemicals.
- Use two boards. One dedicated to raw meat and fish, one for vegetables and bread.
What If I Can’t Find a Single-Slab Board
The absolute simplest DIY option is to purchase a single plank of hard maple or cherry hardwood from a lumber yard, have it cut to your desired size, sand it through to 220-grit, wet it and re-sand, and finish with coconut oil or beeswax. No glue, no clamps, no joinery. Even a beginner can complete this in a couple of hours.
Comparison Summary
| Feature | Plastic Board | Store-Bought Polished Wood | Stainless Steel | DIY Natural Wood |
|---|---|---|---|---|
| Microplastics in food | Yes, significant | No | No | No |
| Chemical coatings | Sometimes | Often, with lacquer, varnish, adhesives | None, with food-grade steel | None, if built correctly |
| Knife-friendliness | Good | Good | Poor, dulls knives | Excellent |
| Bacterial safety | Poor, grooves harbor bacteria | Moderate | Excellent | Excellent, if dried properly |
| Dishwasher-safe | Yes, with degradation | No, laminated | Yes | No |
| Maintenance | Low | Low | Very low | Moderate, periodic oiling |
| Longevity | Poor | Moderate | Excellent | Excellent |
| Cost | Low | Low to Medium | Medium to High | Low to Medium |
| Overall safety rating | Concerning | Moderate concern | Safe | Best overall |
Recommendation
For those who want the safest possible cutting surface with zero compromise:
Build or buy a natural hardwood cutting board, ideally made from a single slab of hard maple, walnut, or cherry with no glues and no chemical finish. A DIY board built from lumber-yard hardwood and finished with fractionated coconut oil or beeswax is the gold standard. It contains no synthetic materials, it won’t shed microplastics, it won’t leach chemicals, and it’s genuinely kind to your knives. Properly maintained, it will outlast everything else in your kitchen.
For those who want a low-maintenance, no-skill alternative:
A food-grade stainless steel cutting board, 304 or 316L grade, is an excellent choice. It’s the most hygienic surface available, sheds absolutely nothing into your food, and lasts indefinitely. Accept the trade-off. You will need to sharpen your knives more frequently. Pair it with a good honing steel and this becomes a minor inconvenience rather than a real problem.
The bottom line on plastic:
The research is sufficiently concerning that continuing to use plastic cutting boards as your primary food prep surface is difficult to justify. The microplastic load from daily use over months and years is significant, the long-term health effects are still being studied, and safer alternatives are readily available. If you have plastic cutting boards at home, consider replacing them, and prioritize this over other kitchen upgrades.
Sources: